 All
Indirect System Photographic Films consist of a light-sensitive emulsion
affixed to a transparent base or backing sheet, with special adhesives.
Indirect Films are exposed, developed (except Pulsar and Ulanolux UP3),
washed out with skin temperature water and then adhered to a
screen.
All
Indirect System Photographic Films consist of a light-sensitive emulsion
affixed to a transparent base or backing sheet, with special adhesives.
Indirect Films are exposed, developed (except Pulsar and Ulanolux UP3),
washed out with skin temperature water and then adhered to a
screen.
Indirect films offer superior fine detail reproduction; sharp printing edges; uniform stencil thickness; predictable standardized exposures; close control of stencil thickness, hence ink deposit; fast and simple stencil production; and easy stencil removal for efficient mesh recovery. All Ulano gelatin-based Indirect Films are totally solvent resistant. The topcoat on Ulano Indirect Films prevents tackiness under conditions of heat and high humidity.
Gelatin Film Processing Instructions
 Storage
-
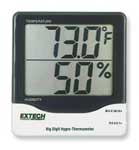
- Gelatin films will not perform correctly if stored in humidity less than 30%.
- Use a humidifier to increase the storage aread to an ideal of 50%
- Step 1: PREPARE THE MESH
- Used or surface-treated mesh need only be degreased using Screen Degreaser Liquid No. 3 or dilute Screen Degreaser Concentrate No. 33. New mesh that is not surface treated should be mechanically abraded. This increases the surface area of the mesh surface for a better mechanical bond of the stencil. Use Microgrit No. 2 before degreasing. Abrading and degreasing can be combined in one step with Ulanogel 23. Rinse thoroughly with clean water.
- Step 2: EXPOSE THE STENCIL FILM
 Place
the emulsion side of a right-reading photo positive against the backing
sheet of the stencil film in a vacuum frame. The positive should be between
the light source and the stencil film, and the exposure should be
through the backing sheet of the stencil film.
Place
the emulsion side of a right-reading photo positive against the backing
sheet of the stencil film in a vacuum frame. The positive should be between
the light source and the stencil film, and the exposure should be
through the backing sheet of the stencil film.
From the Base Exposure Table below, select a Base Exposure Time corresponding to the film you are using and the light source you have. Multiply the Base Exposure Time by the factor for each relevant variable listed in the Exposure Variables Table below to find your Approximate Exposure Time. Use the Approximate Exposure Time as the central time in a Step Wedge Test, or with the Ulano Exposure Calculator.- Step 3: DEVELOP THE STENCIL FILM
- Dissolve pre-measured A & B Developer Powders according to the instructions
on the packet. (Hydrogen peroxide can be used if A & B Powders are not
available. It should be diluted to a 1½% solution in a clean glass or
plastic container using distilled water only.)
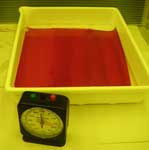
Place the exposed film, emulsion side up, in a developer tray. Pour the developer solution quickly and evenly over the film. Let the film develop for 90 seconds (180 seconds for Ulanoprex). Rock the tray occasionally to carry fresh developer across the surface of the film. - Step 4: WASH OUT THE STENCIL
- Use a gentle washout spray preferably with an aerator nozzle to wash
out the stencil at the recommended temperature. Water temperature will
effect your washout time.
Wash out the film for several minutes until all the unexposed emulsion has been washed away. Then, gradually lower the temperature of the water to room temperature. Continue to wash for 30 seconds. Recommended
Washout Temperatures for Gelatin Films
Recommended
Washout Temperatures for Gelatin FilmsBlue Poly-2, Blue Poly-3 36-40°C 97°-104°F Quasar R 100 36-40°C 97°-104° F Super Prep, Hi-Fi Green 38-41°C 100°-105° F Red TI 41-43°C 105°-110° F Ulanoprex 43-49°C 110°-120° F - STEP 5: ADHERE THE STENCIL
- Place the washed out film, emulsion side up, on the buildup board. Gently
lower a properly prepared, damp screen, printing side down, onto the film.
Place a pad of newsprint (unprinted newspaper stock) on the squeegee side
of the screen. Wipe over the newsprint pad with a folded rag or print
roller to blot the soft top layer of the film up into the mesh. Remove
the bottom sheets of wet newsprint, and continue blotting. Repeat this
procedure until the newsprint picks up little or no color from
the film emulsion.
Problems adhering usually come from old film, developing in water hotter than recommended, or over exposure. - Step 6: DRY THE STENCIL: REMOVE THE BACKING SHEET
- Dry the adhered stencil thoroughly with cool air. When the mesh surrounding the film is dry (and before the stencil is dry),with the plastic support still in place, apply Screen Filler No. 60 or Extra Heavy Blockout No. 10 to the open area of the screen. After the stencil and blockout have both dried, peel off the plastic support.
- STENCIL REMOVAL
- Remove all ink from the screen with the recommended solvent. Degrease with Screen Degreaser Liquid No. 3 to speed stencil removal. Wet both sides of the stencil with hot water and let stand for a few minutes. Use Enzyme No. 1 neutralized with vinegar to remove the stencil.